Click the below toggles to learn about various components of the Daily Deal Builder platform.
Dashboard
Your dashboard gives you a snapshot of your sales and activity by markets you are selling in. You can sort your data by date, proposal type, and category.
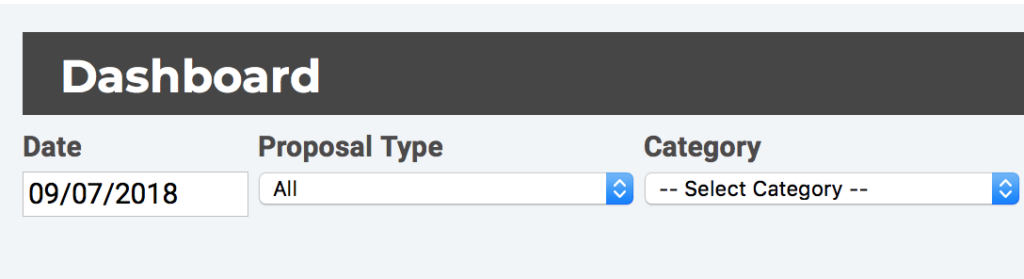
If you choose the option to “Use Range”, you can choose a date range and proceed to view or export information for that specific date range chosen.
You also will notice your Reports drop down tab. You can pull any report directly from this tab to view specific data.
Merchants
Your merchants tab is where you can view, search, and create new merchants. You can specify certain search criteria to easily find your merchants.
Creating a Merchant by selecting the “New” button is the first step in the offer creation process. Conversely, if you are not yet prepared to fill out and create a full new merchant profile, you can choose the “Quick” option which allows you to create a new merchant lead. Prior to generating any contracts for the merchant, you will need to update the merchant account and fill out any missing items.
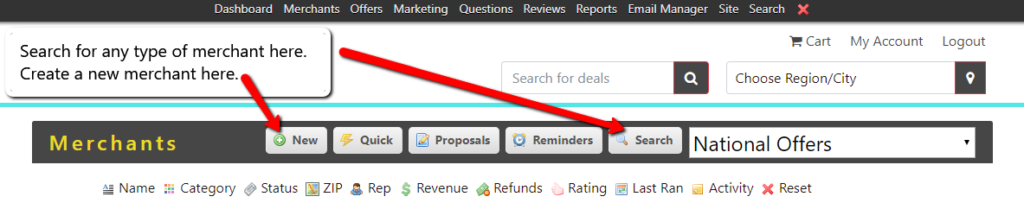
If a merchant (or any user) needs to know their login information, choose the search option in the total top right menu item and search for their email. When the info pulls up, select edit and you will be able to initiate a password reset or manually add a new password for them. If you manually update their password, be sure to email them the updated password.
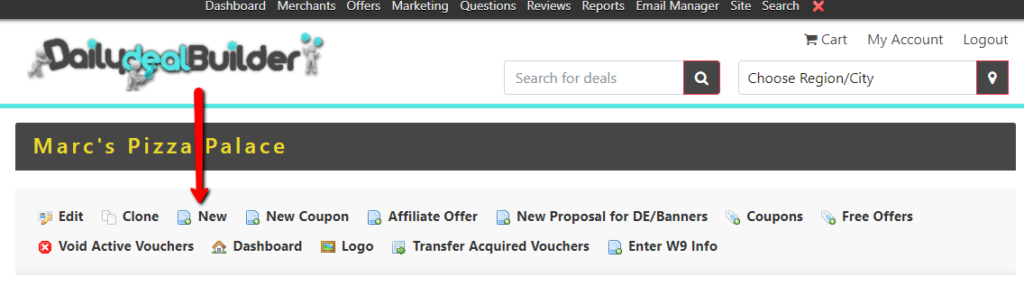
Once a merchant is created, you can then proceed to generate a new contract / proposal.
To create a new proposal for a merchant, search and find the particular merchant and proceed to select their name.
From here you’ll choose “New” to generate their proposal.
Once the proposal has been generated, you will need to either manually execute yourself or email the proposal to the merchant using the email option. The contracts are found at the bottom of the page while viewing the merchant. For executed contracts, you can choose the offer title name and it will direct you inside the offer to add copy, images, and finalize / publish the offer.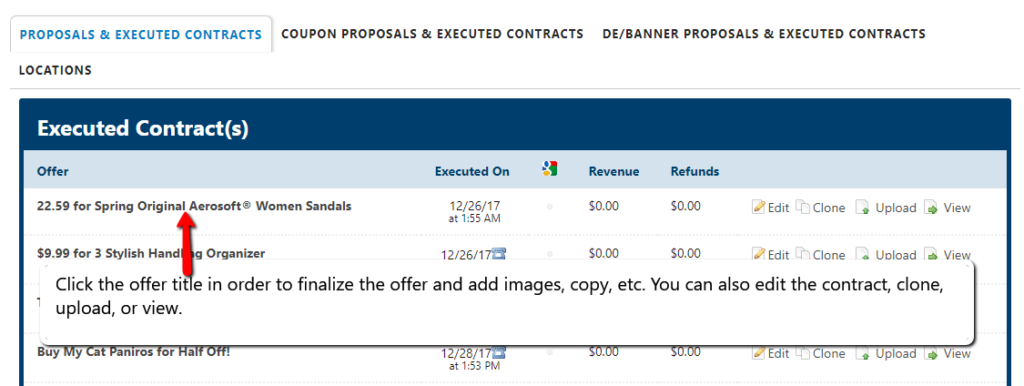
Offers
Manage your existing and upcoming offers. The offer creation process is a 3 step process:
- Create the merchant
- Generate and execute a “New” Proposal
- Finish filling out the offer copy, images, and offer options.
After a proposal is executed, you can select the proposal titles link listed at the bottom of the merchants management page. This will then open up the offer so that you can finalize it and publish it.
VIDEO
Marketing
DDB has a plethora of marketing programs that you can use on your site.
Affiliates: You can create affiliates here. Fill out all of the information and input what commission structure you will be giving the affiliate. Be sure to mark the affiliate as active.
Promo Codes: Promo codes are a brilliant way to generate a spike in sales on slow days, holiday’s, or to reward certain customers (such as top buyers). Choose “Add New” and proceed to fill out all of the information, choose which offers, categories, or cities the promo code will be active for, and remember to mark the promo code as active. : This is where you can generate promotional emails for your site. Fill out the information and add your html text on the right hand side. Create various “Promotions” outside of your normal deal emails. These can help cut through email blindness that often occurs.
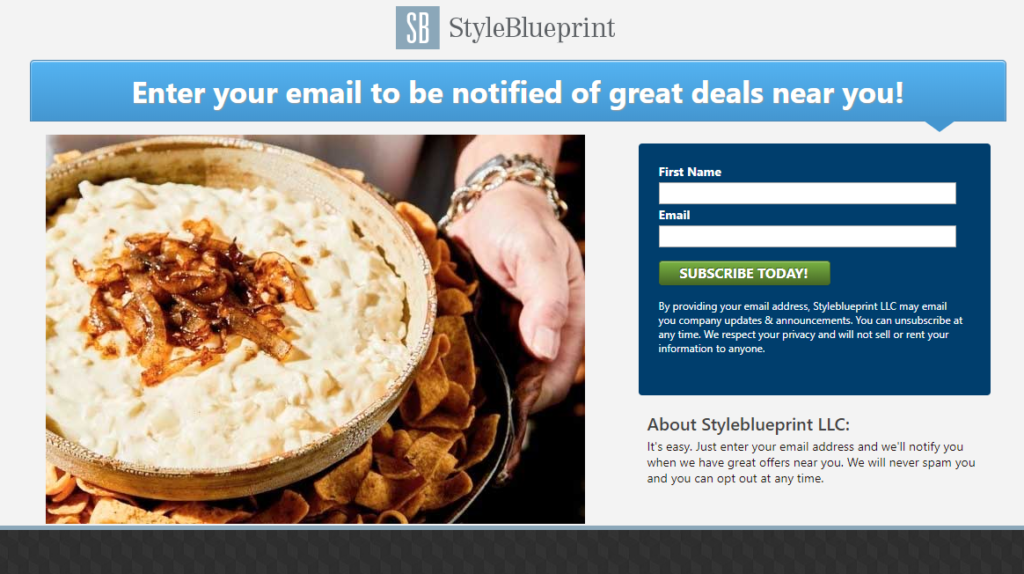
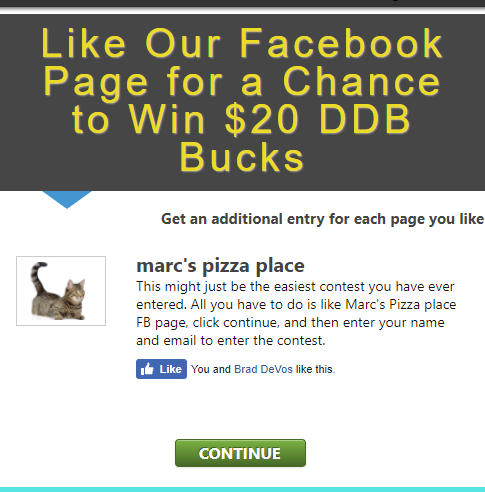
 Landing Pages: You can create 4 different types of landing pages for your site. Contests, mailing list sign-up, poll / vote, or a user registration page. These pages are great to use for subscriber growth.
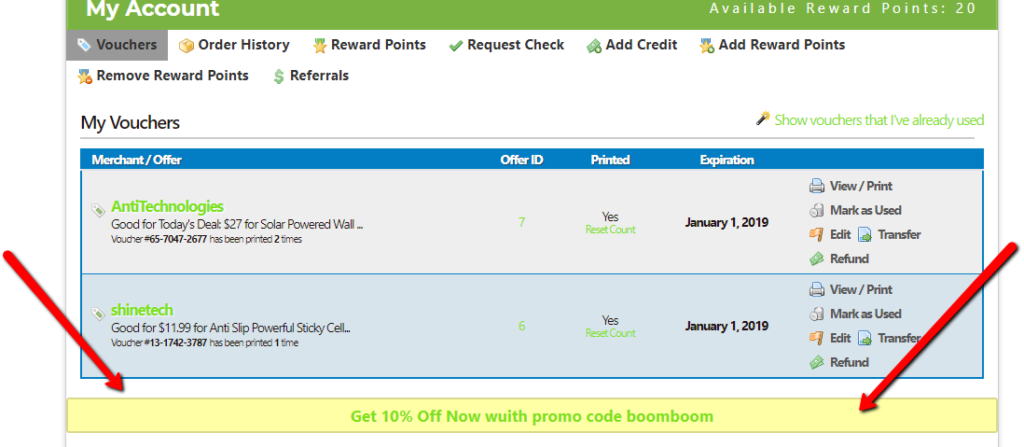
 Promotions: Promotions are small site notification promotions (shown below) where you can highlight certain offers to specific cities on your site. Select Add new and fill out the information. These are wise to use to highlight various promo code campaigns, or push more traffic to your main offers.
 Social D: Social D is an optional way to run specific, trackable Facebook campaigns for your offers on your website. To implement this will require some specific updates and criteria from you. We’ll need to learn what your existing strategy is for posting deals and what type of FB Promo code would you like to use, if any? This can then shorten your deal links so that you use the shortened links when posting your deals and properly track sales.
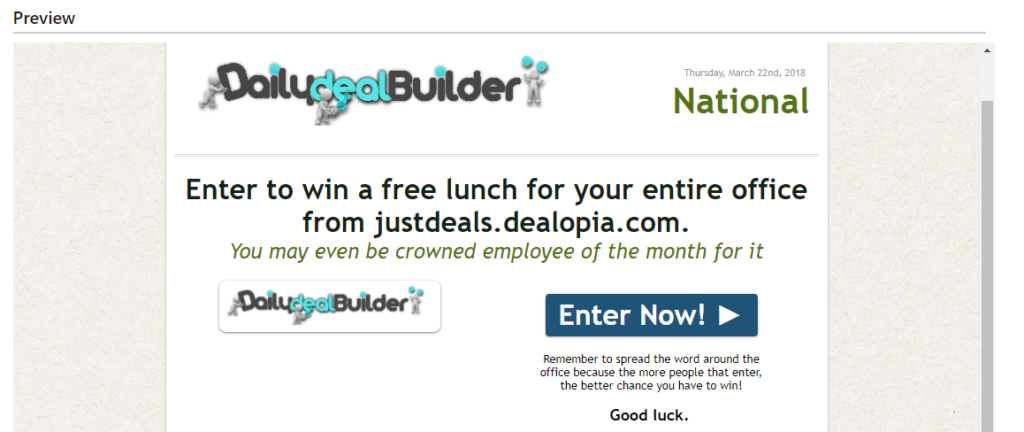
National Blasts: National Blasts enable you to generate emails for your main national offers and proceed to choose whichever offers you would like.
Stores: Setting up specific stores for special events or holidays is a great way to put emphasis on certain promotions and increase sales.
Promotion Pages: Here you can build various promotion pages such as the below.
 |
 |
Notifications: These are small site notification bar promotions to display a short amount of text pushing your users to visit certain deals or use certain promotion codes.
Push Notifications: In order to queue out push notifications, you’ll need to ensure your APIs Settings are successfully hooked up with Twilio.com.
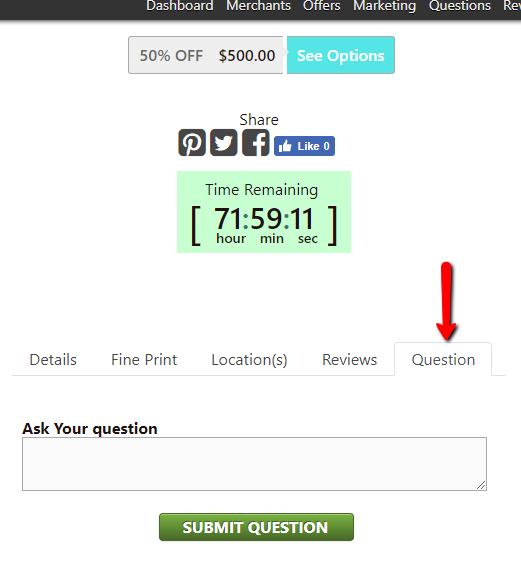
Questions
You can activate whether or not you desire a questions tab directly on your offers in Site >> Email Settings.
a. An offer email allows you to choose one main offer, and it will then populate with 4 of the most recent offers.
b. A custom email allows you to input any custom html email you would like.
c. A Multi–Offer email allows you to pick any offers you would like to include in an email blast. We recommend no more than 15.
5. Schedule the email or send now.
Reviews
Here you can manage the reviews that are submitted to your site. On your offers, one of the tabs is for reviews.
Reports
Here you can view your sales and refund reports. You also have the ability to view a wide assortment of other reports. If you need specific formatting or specific reports, please email us at support@hcdesk.com.
Site
Account Information: Fill out your site information as well as your email send from and reply to names.
Background and Logo: Upload a new site logo or background design. Please note that due to caching and cron jobs, it may take up to an hour for the new design to appear on your website.
Cities: Add and manage your cities.
Categories: Add and manage site categories or sub-categories.
Payments: Payments category allows you to set up your payment terms as well as input your gateway credentials for payment processing. Payment terms can be single or multi-step. For further information on accepting payments, please visit our Payments page.
Employee Management: Add new employees here. After you add an employee, you’ll then be able to limit or grant them further access to the site via the ACL settings.
Email Settings
SEO Settings: Input your meta Title, Description, and Keywords here. This is also where you will enter your Global Google Analytics code. See: Google.com/analytics/.
FAQs: The FAQs page can display your customers frequently asked questions. We encourage you to let your voice shine through this. We got in the deal industry because we initially fell in love with Woot.com. Their marketing copy on pages such as the FAQ are superb. This page is wise to input questions such as: How do I buy things? How do you guys get deals so cheap? What do I do if I need to buy more or get a refund? Who do I tell about how much I love your website?
APIs Settings: Our system integrates with Bill.com to alleviate and manage merchant payouts. Once you have set your Bill.com account up, you’ll need to paste your username, password, organization key and application key into the APIs settings.
For the Facebook integration, you’ll need your application ID, shared ID, and secret key. Help doc: https://developers.facebook.com/docs/apps/register
Finding your Google Map key: https://developers.google.com/maps/documentation/javascript/get-api-key
Twilio.com is a service that can enable push notifications and text message marketing. Once you have your account with them, you’ll need your Account SID, Auth Token, Application SID, Client Name, Caller SID, and Transcribe.
MaxMind.com does IP Geolocation and Online Fraud Prevention. They are a leading provider of IP intelligence and online fraud prevention tools.
The Yelp integration API exposes search to 3rd party developers. Thus enabling you to display Yelp ratings on promotions.
Press Releases: Create and release a press release in this section.
Generate Vouchers
Clear Cache: Clear cache for a specific or multiple cities here.
Maintenance Mode: Choose this option if you need to put your site in maintenance mode for any reason.